I’ve taken three related classes at The School of Historical Dress this fall: Tailoring Stitches and Techniques, Doublets, and Hose. Each class day is long, as we often have more material to cover than can fit in several days of a 9-to-6 schedule. Sometimes we leave with homework sewing. Sometimes we rush lunch a little. Often we stay a few minutes later. Or an hour. And always, class ends before we can finish our sewing projects.
This is far from a complaint – I LOVE my time in class. It is just exhausting, consuming, and indicative of how massive a subject historical tailoring really is.
My instructors were Jenny Tiramani, Claire Thornton, and Melanie Braun. These amazing ladies worked together recreating historically accurate clothing for Shakespeare’s Globe and on the V&A books Seventeenth Century Women’s Dress Patterns, Books 1 and 2. They’ve sewn, designed, researched, written, taught, and learned together – and it is clear throughout the classes that they are still questioning, observing, and reevaluating their techniques. Hearing them at work is both fascinating and reassuring: if they debate how something should be done, I can hardly fault myself for being uncertain!
I consider myself a competent seamstress with little knowledge of tailoring techniques. I had attempted some fitted clothing that a tailor would make – gowns, doublets, kirtles – but with only modest success. I had draped toiles and created patterns from that. I had read the little 18th century sewing pamphlet The Workman’s Guide to Tailoring Stitches and Techniques – which made me more certain that I did NOT know how to be a proper tailor.
I still don’t know how to be a proper tailor, but I’ve learned a lot! I will try to share what I have learned, hoping both to cement it in my mind and make it available for others. Please assume that any errors are due to my faulty memory, not the instruction received; class moves so quickly that I simply can’t take adequate notes. I haven’t yet learned to write while sewing.
TAILORING STITCHES AND TECHNIQUES
Who were the tailors?
Tailors likely evolved from the Linen Armorers, a group of people skilled in sewing many layers of fabric to give a precise shape. Tailors, historically, stitched layers of fabrics, interlinings, and padding to create the desired shapes; modern ones do more stretching and shaping the wool to fashion the garment. Tailors were men; women could be seamstresses or embroiderers, but there isn’t evidence of women making outer garments until roughly the 1690s when female mantua-makers appear in the record. Tailors were almost certainly guild members, and likely had a specialized skill set even within the tailoring profession. The most extreme tailoring – peascod bellies and skintight hose, puffy paned breeches and gowns over farthingales – happened in the late Elizabethan and early Jacobean period (1580-1640).
This class took place over two days, during which we constructed a sampler using techniques found on extant garments from 1400 to 1800:
Materials
One fabulous part of classes with The School of Historical Dress is getting to use the right materials. One frustrating part is trying to figure out the terminology so that I could, if I wanted, buy comparable tools and materials later. Not only are the fabric, thread, and tool terms specialized, but some of them change meanings over time, and some terms are used in the UK but not the US (or vice versa). Struggling to master the tailor’s language reminds me how much I have to learn, and how daunting it is for a beginning sewer to tackle recreating historic clothing.
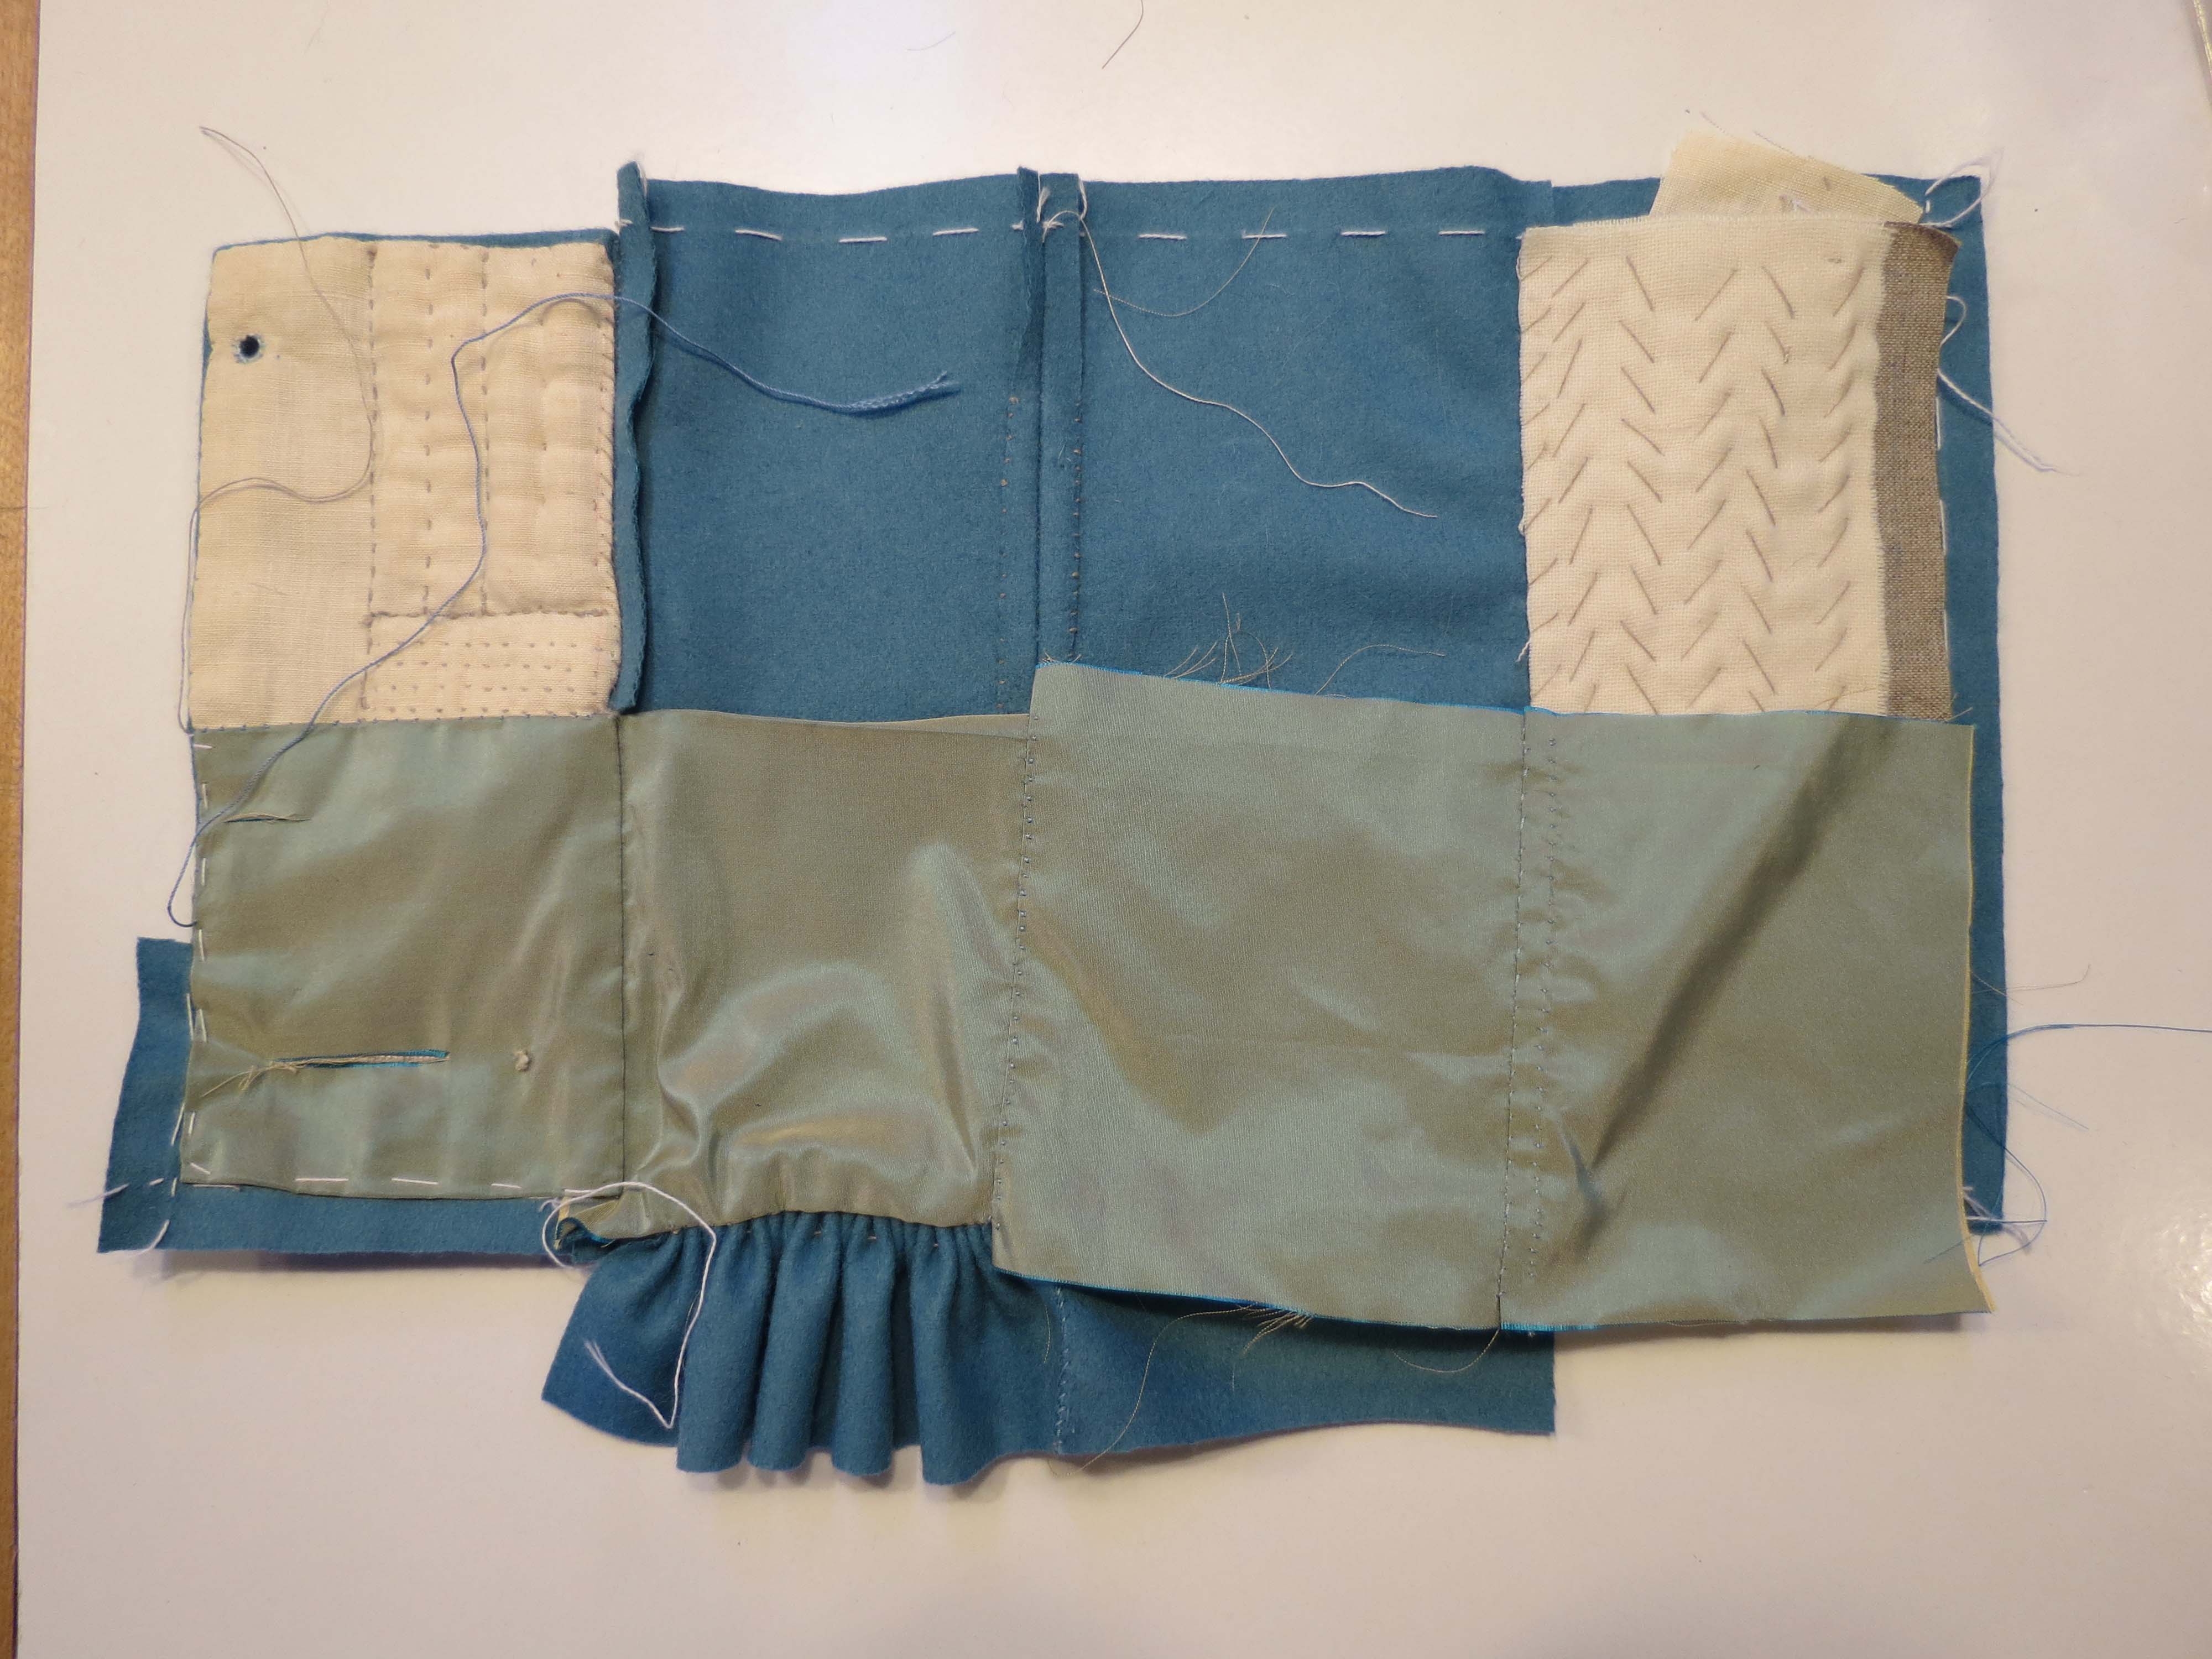
My sampler outer blue fabric is a wool melton, closely enough woven and felted that the cut edges do not fray. The panel on the left (above) has a linen canvas interlining from top to bottom, with a tightly woven white linen lining on the top half and a shot silk taffeta lining on the bottom. The silk looks green because the warp threads are teal blue and the weft threads golden cream. The right panel has a natural linen canvas interlining stiffened with rabbit hide glue and two layers of undyed wool voltaire pad-stitched over it. We sewed wool and linen with two-ply linen thread, and the silk and buttonholes with silk twist.
Techniques
Before cutting, we traced our pattern pieces with chalk, then tacked the stitch lines with cotton basting thread. I’m not used to tacking anything, but Claire stressed the importance of this technique throughout the class. While doing the sampler (which had nothing but straight edges and right angles) it just didn’t make sense: why did I need to tack my sewing line, if it was 3/8 inch in from the edge? I have enough sewing experience that I can just “see” 3/8 inch, half an inch, and a quarter inch. When we sewed the doublets and hose, THEN the technique made sense. Where exactly does that shoulder come to a point or that side seam end? The chalk lines wear off during the extensive handling the fabric gets before you reach the assembly stage; without the basted seam line, we couldn’t achieve precise fit.
We cut our pieces with 3/8 inch seam allowance. Jenny stresses that we should work in yards and inches because, at least for an English tailor, these were the basic units of measure they used. We delved more deeply into this in later classes, the concept that tailors cut patterns based on halves, quarters, thirds, etc. of a yard (and related measures).
Then we tried out different seams. I cannot begin to teach these adequately here, so if any seem unfamiliar, find a good book that will explain them. Backstitch, half back stitch, and running stitch were quite familiar to me; we used these to assemble our wool panels.
The right-hand panel is joined to the center with a less familiar seam: counter hemming. This works well here because of the strong cut edge of the wool, and creates the flattest join. The right and center panels are overlapped 3/8 inch, and each raw edge is felled. I am fairly certain that my teachers advised me to do the outside seam first, and then finish the inside edge, with the theory being that the first seam would look the neatest. I’m also fairly certain that I forgot and did it the other way around…no way to tell now that it is sewn.
We used a running stitch and a felling stitch on the wool seam allowances, and discussed which direction to sew. Do you sew right to left, or left to right? I’m right handed, and most of the time I sew from right to left, but the tension and shaping in your stitches is slightly different if you fell the opposite way. I tried both, and they both left neat rows, so I think I could happily work either way. The surest way to know which direction an extant garment was sewn is to discover a knot in the thread showing that they started at that point, and that almost never happens.
Speaking of knots, we didn’t use them. We anchored threads by sewing a stitch or so forward, then back. I learned that technique long ago, but I know it is still not what most beginning hand sewers are taught. I highly recommend it; this anchoring technique is stronger and more secure than tying a knot in your thread, especially in loosely woven fabrics. It also saves you the trouble of fiddling with little knots. Although there is evidence that some historical garment seams were sewn with a knotted thread, I agree with my teachers: forward and back anchoring is a more common and better technique.
We used different seams to join the silk. The center seam is prick stitched, meaning I sewed the fabric right sides together, then folded the fabric to one side and top stitched the seam finished about 1/8 inch from the fold with a sort of running stitch that left long stitches underneath and tiny pricks of thread visible on the surface. On the inside, three layers of fabric (both seam allowances and one piece of silk lining) fold to one side, with only a single layer of silk to the other. Works fine on a thin taffeta, probably isn’t the best technique for bulky fabrics. This technique also leaves raw edges on the inside, which would not work if the inside were ever exposed.
Another silk seam is counter hemmed, like the wool. Because the silk frays easily, each edge is folded under and felled on a creased edge. It makes a neat, flat, completely finished seam, with raw edges enclosed on both inside and out.
We attached two pieces of wool to the bottom hem. One is pleated on with three rows of large, even gathering stitches, the other, cut on a curve, is eased on with two rows of much smaller gathering stitches.
On to the techniques that a tailor, but not a seamstress, used! We tried quilting through a layer of wool slither (or roving, the loose woolly stuff that is combed and ready for spinning) and quilting through multiple layers of woven wool cloth – both techniques used from medieval times. We quilted channels and stuffed them with the wool slither, creating the thicker, firmer lining necessary for Elizabethan clothing forms. We pad-stitched two layers of wool onto glue-stiffened linen, attempting to set a gentle curve into our right hand panel. Others were more successful at this than I was.
After sewing linings and interlinings to the wool, we raced to complete closures. Cloth-covered pasteboard buttons were no problem for me, and cloth buttons were familiar. Thread covered buttons would have been new to me, but they gave us each one instead of teaching us to make them. (A tailor probably would have bought the buttons, anyway, from someone who specialized in such.) Eyelets I know well how to complete, and I’m solid on making a buttonhole using blanket stitch, but I never had learned how to make a proper buttonhole stitch. And at almost 6 p.m. on the second day of class, I was too tired to master it. I tried, I got some of the stitches right, but I didn’t get them all right. Perhaps it would have been easier if I hadn’t been trying to learn how to make a buttonhole stitch while also learning how to make a long 18th century buttonhole, the sort where the silk lining is sewn down separately and only the outer fabric and interlining are caught in each stitch.
My sampler is incomplete, and I fear I no longer remember which techniques were to be applied to which sections, so it will probably remain that way. Still it is an interesting and (thanks to the handout with all the names of techniques and materials used) useful reference. I look forward to practicing the less familiar portions of the project while sewing my family new historical clothing.
